


Self-Supervised Learning of 3D Human Pose using Multi-view Geometry (CVPR2019) [project page]
This is a pytorch implementation of Self-Supervised Learning of 3D Human Pose using Multi-view Geometry paper.
Self-Supervised Learning of 3D Human Pose using Multi-view Geometry,
Muhammed Kocabas*, Salih Karagoz*, Emre Akbas,
IEEE Computer Vision and Pattern Recognition, 2019 (*equal contribution)
In this work, we present EpipolarPose, a self-supervised learning method for 3D human pose estimation, which does not need any 3D ground-truth data or camera extrinsics.
During training, EpipolarPose estimates 2D poses from multi-view images, and then, utilizes epipolar geometry to obtain a 3D pose and camera geometry which are subsequently used to train a 3D pose estimator.
In the test time, it only takes an RGB image to produce a 3D pose result. Check out demo.ipynb to
run a simple demo.
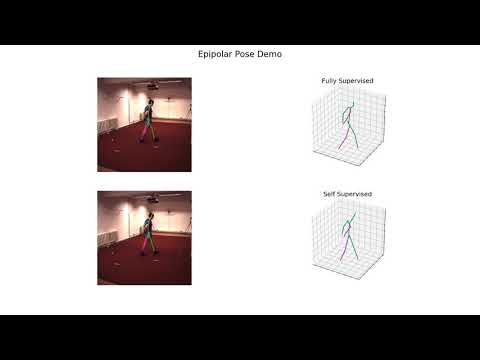
Here we show some sample outputs from our model on the Human3.6M dataset. For each set of results we first show the input image, followed by the ground truth, fully supervised model and self supervised model outputs.

scripts/: includes training and validation scripts.lib/: contains data preparation, model definition, and some utility functions.refiner/: includes the implementation of refinement unit explained in the paper Section 3.3.experiments/: contains*.yamlconfiguration files to run experiments.sample_images/: images from Human3.6M dataset to run demo notebook.
The code is developed using python 3.7.1 on Ubuntu 16.04. NVIDIA GPUs ared needed to train and test.
See requirements.txt or environment.yml for other dependencies.
-
Install pytorch >= v1.0.0 following official instructions. Note that if you use pytorch's version < v1.0.0, you should follow the instructions at https://github.com/Microsoft/human-pose-estimation.pytorch to disable cudnn's implementation of BatchNorm layer. We encourage you to use higher pytorch's version(>=v1.0.0)
-
Clone this repo, and we will call the directory that you cloned as
${ROOT} -
Install dependencies using
pip.pip install -r requirements.txtor create a new
condaenv:conda env create -f environment.yml -
Download annotation files from GoogleDrive (150 MB) as a zip file under
${ROOT}folder. Run below commands to unzip them.unzip data.zip rm data.zip -
Finally prepare your workspace by running:
mkdir output
mkdir models
Optionally you can download pretrained weights using the links in the below table. You can put them under
modelsdirectory. At the end, your directory tree should like this.${ROOT} ├── data/ ├── experiments/ ├── lib/ ├── models/ ├── output/ ├── refiner/ ├── sample_images/ ├── scripts/ ├── demo.ipynb ├── README.md └── requirements.txt -
Yep, you are ready to run
demo.ipynb.
You would need Human3.6M data to train or test our model. For Human3.6M data, please download from
Human 3.6 M dataset.
You would need to create an account to get download permission. After downloading video files, you can run
our script to extract images.
Then run ln -s <path_to_extracted_h36m_images> ${ROOT}/data/h36m/images to create a soft link to images folder.
Currently you can use annotation files we provided in step 4, however we will release the annotation preparation
script soon after cleaning and proper testing.
If you would like to pretrain an EpipolarPose model on MPII data,
please download image files from
MPII Human Pose Dataset (12.9 GB).
Extract it under ${ROOT}/data/mpii directory. If you already have the MPII dataset, you can create a soft link to images:
ln -s <path_to_mpii_images> ${ROOT}/data/mpii/images
During training, we make use of synthetic-occlusion. If you want to use it please download the Pascal VOC dataset as instructed in their repo and update the VOC parameter in configuration files.
After downloading the datasets your data directory tree should look like this:
${ROOT}
|── data/
├───├── mpii/
|   └───├── annot/
|       └── images/
|
└───├── h36m/
    └───├── annot/
        └── images/
            ├── S1/
            └── S5/
            ...
Download pretrained models using the given links, and put them under indicated paths.
| Model | Backbone | MPJPE on Human3.6M (mm) | Link | Directory |
|---|---|---|---|---|
| Fully Supervised | resnet18 | 63.0 | model | models/h36m/fully_supervised_resnet18.pth.tar |
| Fully Supervised | resnet34 | 59.6 | model | models/h36m/fully_supervised_resnet34.pth.tar |
| Fully Supervised | resnet50 | 51.8 | model | models/h36m/fully_supervised.pth.tar |
| Self Supervised R/t | resnet50 | 76.6 | model | models/h36m/self_supervised_with_rt.pth.tar |
| Self Supervised without R/t | resnet50 | 78.8 (NMPJPE) | model | models/h36m/self_supervised_wo_rt.pth.tar |
| Self Supervised (2D GT) | resnet50 | 55.0 | model | models/h36m/self_supervised_2d_gt.pth.tar |
| Self Supervised (Subject 1) | resnet50 | 65.3 | model | models/h36m/self_supervised_s1.pth.tar |
| Self Supervised + refinement | MLP-baseline | 60.5 | model | models/h36m/refiner.pth.tar |
- Fully Supervised: trained using ground truth data.
- Self Supervised R/t: trained using only camera extrinsic parameters.
- Self Supervised without R/t: trained without any ground truth data or camera parameters.
- Self Supervised (2D GT): trained with triangulations from ground truth 2D keypoints provided by the dataset.
- Self Supervised (Subject 1): trained with only ground truth data of Subject #1.
- Self Supervised + refinement: trained with a refinement module. For details of this setting please refer to
refiner/README.md
Check out the paper for more details about training strategies of each model.
To train an EpipolarPose model from scratch, you would need the model pretrained on MPII dataset.
| Model | Backbone | Mean PCK (%) | Link | Directory |
|---|---|---|---|---|
| MPII Integral | resnet18 | 84.7 | model | models/mpii/mpii_integral_r18.pth.tar |
| MPII Integral | resnet34 | 86.3 | model | models/mpii/mpii_integral_r34.pth.tar |
| MPII Integral | resnet50 | 88.3 | model | models/mpii/mpii_integral.pth.tar |
| MPII heatmap | resnet50 | 88.5 | model | models/mpii/mpii_heatmap.pth.tar |
In order to run validation script with a self supervised model, update the MODEL.RESUME field of
experiments/h36m/valid-ss.yaml with the path to the pretrained weight and run:
python scripts/valid.py --cfg experiments/h36m/valid-ss.yaml
To run a fully supervised model on validation set, update the MODEL.RESUME field of
experiments/h36m/valid.yaml with the path to the pretrained weight and run:
python scripts/valid.py --cfg experiments/h36m/valid.yaml
To train a self supervised model, try:
python scripts/train.py --cfg experiments/h36m/train-ss.yaml
Fully supervised model:
python scripts/train.py --cfg experiments/h36m/train.yaml
If this work is useful for your research, please cite our paper:
@inproceedings{kocabas2019epipolar,
    author = {Kocabas, Muhammed and Karagoz, Salih and Akbas, Emre},
    title = {Self-Supervised Learning of 3D Human Pose using Multi-view Geometry},
    booktitle = {The IEEE Conference on Computer Vision and Pattern Recognition (CVPR)},
    month = {June},
    year = {2019}
}
We thank to the authors for releasing their codes. Please also consider citing their works.
This code is freely available for free non-commercial use, and may be redistributed under these conditions. Please, see the LICENSE for further details. Third-party datasets and softwares are subject to their respective licenses.